
We can assess a garment’s shape and fit on a dress form before turning the design into a sewing pattern. This hands-on work lets us test an original idea with real fabric, rather than relying on a sketch alone. Grainline means the lengthwise or crosswise direction of a woven fabric’s yarns. Watching that direction helps us see how a piece hangs and where it pulls.
Designers use this process to explore shape, fit, and movement as they work. We can begin with a clear idea, then adjust the fabric by hand as new possibilities appear. The result is a useful bridge between fashion design and a finished garment. We’ll move from setting up a practice drape to preserving its shape as a pattern. No advanced skills are needed to begin. A simple first project can begin with one clear sketch and a willingness to adjust the fabric by hand.
Key Takeaways
- Draping lets us judge a design on a three-dimensional form.
- Use woven muslin that behaves much like the planned garment fabric.
- Keep grain direction in mind as the cloth falls and shifts.
- Mark the finished drape before removing it from the form.
- Begin with a simple shape and adjust it in small steps.
What Can Fashion Draping Techniques Help Us Design?
Draping is most useful when we need to see how a design and fabric behave together in three dimensions. It lets us shape a garment on a dress form and judge the result as real fabric, not just lines on paper. We can begin with a sketch or reference image, or explore freely as the cloth falls.
The art of fashion draping is the practical act of shaping fabric directly on a three-dimensional form. We can check silhouette and fit on the form before making a flat pattern. That early view can reveal design problems that a drawing cannot show, while paper pattern work later turns the shaped fabric into pieces for sewing.
Choose draping when a design depends on volume or fabric movement that is hard to judge from a sketch alone.
Planned draping follows a sketch or image, while spontaneous draping responds to fabric weight and fall. Both approaches help fashion designers test how a garment takes shape. Bias-cut styles, eveningwear, ball gowns, bridalwear, and experimental forms often benefit from this direct view.
Three Fall 2025 collections show distinct ways designers used draped fabric. Calvin Klein by Veronica Leoni included draped skirts, dresses, and outerwear. Issey Miyake wrapped fabric strips around the body, while Rick Owens layered colored sheets into raw, textured drapes.
These examples show different visual choices, not a single rule for design. Our own fabric can suggest a soft fold, a strong wrap, or an uneven fall. Choose a form-first approach when the design depends on volume or fabric movement that is hard to judge from a sketch alone.
Which Tools and Dress Form Do We Need?
A pinnable dress form that matches the intended measurements is the most useful starting point. Forms are available in US8, US10, and US12, though size labels alone do not confirm a close match. Check its bust and hip measurements, and pad it to the target size when needed.
A dress form should match the body measurements we plan to fit. A measuring tape helps us check those points before draping begins. The other core tools keep fabric secure and give us ways to mark, cut, and shape it with care.
| Item | What it does | Practical check |
|---|---|---|
| Dress form | Supports pinning and fit checks | Verify bust and hip measurements |
| Muslin | Practice drapes and mock-ups | Choose a suitable weight |
| Pins | Secure and position fabric | Keep them ready for controlled adjustments |
| Measuring tape | Checks measurements on the form | Use it to verify the target size |
| Marking chalk | Records design and seam lines | Choose a mark visible on the fabric |
Muslin is inexpensive cotton used for practice drapes and mock-ups. It gives us a way to test a design without cutting into the intended garment fabric. Keep scissors close for trimming, and use a ruler to check straight lines.
French curves help shape smooth lines, while an armhole curve can guide that part of a bodice. A hip curve and sleeve curve help with other garment areas. One-inch-wide adhesive paper can mark or support edges during the work.
Gather these items in one work area so we can focus on shaping rather than searching for a tool. A form with the wrong measurements can mislead fit checks even when the fabric looks smooth. Check the bust and hip measurements before pinning any fabric to the form.
How Do We Choose and Prepare Muslin?
Start with woven practice fabric whose weight and drape are close to the fabric planned for the garment. Matching those qualities helps us judge how the final garment may hang. Woven cloth is the right choice for this practice, rather than knit fabric.
Standard muslin, cotton twill, cotton voile, and silk/hemp muslin are common choices. Each can serve as a practice fabric, but the best match depends on the intended garment cloth. A light, flowing design and a firm design should not be tested with cloth that falls in a very different way.
Match the Practice Fabric to the Finished Garment
Muslin gives us a lower-cost way to test construction and shape before cutting final fabric. Its weight matters because heavy cloth holds folds differently from light cloth. Its drape matters because a loose fall can change the look of a seam or volume.
Choose a woven fabric that is close enough to reveal how the design will behave. We do not need the practice piece to copy every surface detail. We do need it to respond to shaping in a useful way.
Square, Mark and Press the Muslin
Prepare the cloth so its yarns sit evenly and its reference marks stay dependable. Use this five-part checklist:
- Estimate enough cloth for ease and styling.
- Clip the edge and tear firmly across the grain.
- Keep center front and center back at least 3 inches from the selvage.
- Square the cloth by pulling diagonally until lengthwise and crosswise yarns meet at right angles.
- Press only along the lengthwise and crosswise grains.
To tear across the grain, clip the edge and pull firmly enough to break the yarns evenly. Then pull the cloth diagonally to square it. This blocking step brings the lengthwise and crosswise yarns back to right angles.
Press along those two grain directions after blocking. Never press on the bias, the diagonal direction across the cloth. The selvage has a tighter weave than the rest of the fabric, so keep the center front and center back clear of it to prevent distortion.
How Do We Drape Fabric on a Dress Form?
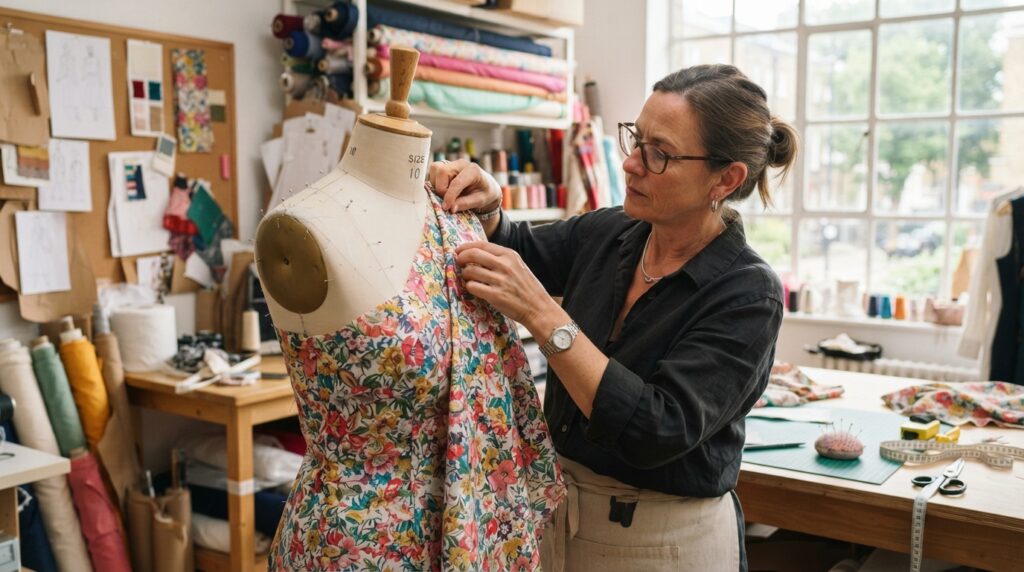
Anchor the muslin at the shoulder seams and center front or back, but do not pull it tight. The cloth needs room to fall in its natural way. A relaxed start makes it easier to spot where the fabric wants to fold or shift.
Begin with stable points, then let the fabric fall without tension. Front and back bodice sections or front and back skirt sections make practical areas to work on. We can focus on one part at a time instead of shaping an entire garment at once.
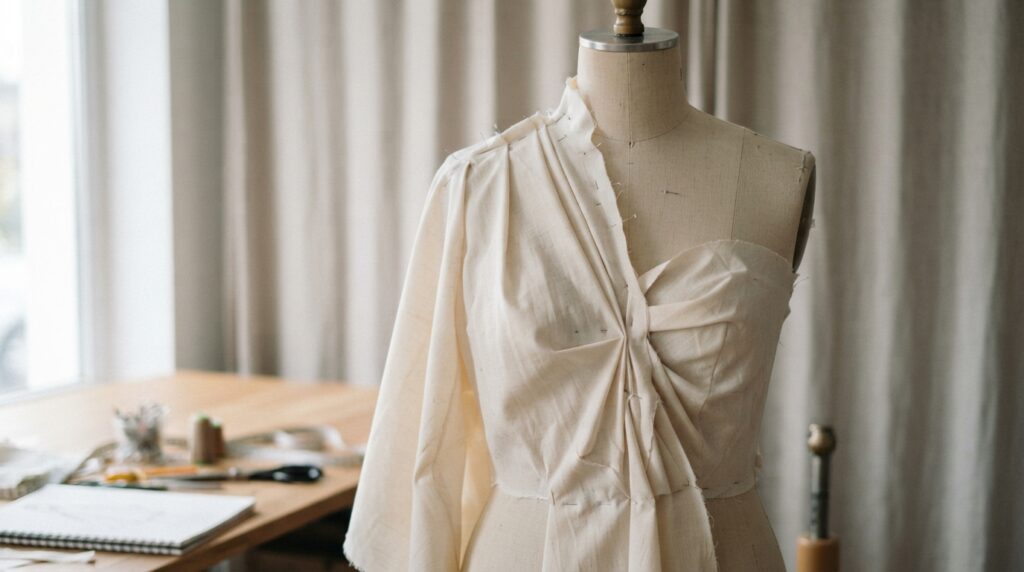
Basic fashion draping techniques for a First Pass
Start with a section large enough to cover the area we are shaping. Pin it at the shoulder seams, then secure it at center front or center back. The pins hold the cloth in place while the rest hangs freely.
We can build the front bodice first, then work on the back bodice. For a skirt, treat the front and back as separate sections. Keeping the work area clear helps us see how one shape affects the next.
For a symmetrical design, we normally model only the wearer’s right side. That side becomes the working half, while the design can be mirrored later. An asymmetrical design needs both sides modeled because each side has a different shape.
Refine Fit Before Marking
Use our hands to guide fullness into the form and shape the desired volume. Look at the fabric from the front, side, and back to judge its fit and proportion. Each angle can reveal a pull or fold that is hidden from another view.
Reposition pins when the fabric sits poorly, and trim excess only when the shape is clear. Smooth puckers and wrinkles by easing the cloth across the form. Small changes can have a clear effect on the silhouette.
Keep adjusting until the section sits as intended without unwanted tension. A tidy front view is not enough if the side or back looks strained. Pause to inspect the form from more than one angle before trimming away fabric.
Which Draping Techniques Create Shape and Volume?
Pleating gives us controlled folds, while gathering creates fullness by drawing fabric into folds. Both techniques change how much fabric occupies an area, though they produce different surface effects. Controlled shaping starts with small choices about where cloth is held or released.
Pleats organize folds, while gathers bunch fabric to add fullness. Simple fashion draping techniques use pinning, tucking, folding, and layering to manage fabric on the form. We can control a fold with a pin or tuck, then build depth by placing one layer over another.
Simple fashion draping techniques for Controlled Folds
Pinning keeps a chosen shape in place as we assess its line. Tucking directs fabric into a small fold, while folding makes a broader, more visible change. Layering can add depth or hide an edge, depending on where the pieces meet.
These methods work well when we want a clear, repeatable shape. We can compare how one fold looks against another without changing the entire garment. A few careful placements often reveal whether a detail supports the design.
Advanced fashion draping techniques for Sculptural Shapes
Bias draping uses fabric cut diagonally to the grain for a more fluid, body-skimming result. It often moves and stretches differently from cloth aligned with the lengthwise or crosswise yarns. Asymmetric draping makes one side or area unlike another through uneven hemlines, necklines, or volumes.
These more expressive choices can move beyond the form’s usual outline. We should watch how the cloth hangs and whether the sculptural shape still looks intentional. The following seven methods make a useful working list, not a fixed industry taxonomy:
- Pinning holds fabric in a chosen position.
- Tucking directs cloth into small folds.
- Folding creates broader changes in shape.
- Layering places one fabric section over another.
- Pleating arranges controlled folds.
- Gathering draws fabric together to add fullness.
- Asymmetric draping creates uneven lines or volumes.
Seven draping methods can cover many design experiments, but they do not limit what we can try. We can combine methods when the fabric supports the idea. Choose the method for the effect we want, then check that the fabric still hangs as intended.
How Does a Finished Drape Become a Flat Pattern?
Mark the finalized design and seam lines while the muslin is still pinned to the form. This preserves the garment’s shape before we remove the fabric. Clear marks help us tell construction lines from the outer edge of the cloth.
Record every line we need before taking the drape off the form. Mark design lines, seam lines, grainlines, darts, notches, and other construction references. These marks guide how the fabric becomes a flat pattern.
Mark the Muslin on the Form
Trace each seam and design line onto the muslin with a clear mark. Add the grainline to show how the piece should sit in the finished garment. Notches and darts help us match sections and shape the garment during sewing.
We can add any other construction reference needed to explain the design. Keep the marks easy to tell apart, especially where lines meet. A careful record on the form saves guesswork once the fabric lies flat.
True the Pieces and Transfer the Pattern
Remove the marked muslin, then flatten each piece without stretching it. Use rulers and design curves to true the lines, meaning to smooth and align them for pattern use. Check that seams joining two pieces have matching lengths.
Transfer the shaped pieces to pattern paper and copy their marks. This is the point where pattern-making methods for designers connect the form-based drape with a sewing draft. The paper pieces record the fabric shape in two dimensions.
For beginning students, a common seam-allowance convention is 1 inch on straight seams and 1/2 inch on curved seams. Those amounts are a learning convention, not a universal rule. The design and sewing needs may call for different allowances.
Before sewing, compare adjoining edges and their marks. A notch should meet its partner, and matched seams should not twist when joined. Check that adjoining seams match before treating the transferred pattern as ready to sew.
How Do Design Principles Guide a Drape?
The five design elements give us a practical way to inspect what a drape communicates visually. Line, color, shape, texture, and space each affect how we read a garment. Looking closely helps us judge more than fit alone.
Use the five elements to ask what the fabric’s visual choices are doing. A seam can guide the eye, while a fold changes the silhouette. These details work together on the form, even before the garment is sewn.
Use Design Elements to Shape the Visual Result
Consider each element as we assess the fabric’s placement. The questions below help connect a physical change with its visual effect.
| Element | Question to consider while draping |
|---|---|
| Line | Where does a fold or seam lead? |
| Color | How do fabric areas relate? |
| Shape | What silhouette does the volume create? |
| Texture | How does the surface affect the look? |
| Space | Where do open or unfilled areas remain? |
These questions give us a way to notice what a single change does to the whole design. Color blocks can divide a garment, while open space can make a dense area feel lighter. We can judge these effects directly on the form.
Balance Proportion and Emphasis on the Form
The five principles of fashion design are balance, proportion, rhythm, emphasis, and unity. Balance may be symmetrical, with nearly identical sides, or asymmetrical, with unequal elements whose visual weight still feels even.
Proportion describes how the parts relate in size. Rhythm comes from repeated lines or shapes, while emphasis draws attention to a chosen feature. Unity asks whether the parts feel like one design rather than separate ideas.
We can assess proportion by comparing a sleeve or skirt volume with the rest of the garment. Repeated folds may create rhythm, while a bold neckline can become the main focus. Check whether the visual weight feels balanced, even when the two sides are intentionally different.
What Common Draping Mistakes Should We Correct?
A twist, drag, or pull that was not part of the design is a sign to check the grain and balance. Ignored grainlines can distort the drape and change the garment’s intended flow. Unexpected tension deserves attention before we accept the shape.
The true bias lies at 45 degrees to the lengthwise and crosswise grains. Grain direction matters when a design depends on bias flow. Other problems can come from the practice fabric, loose pins, rushed changes, or a form that narrows our ideas.
| Mistake | What we may notice | Correction |
|---|---|---|
| Ignoring grainlines | Twists, pulls, or unwanted drag | Realign the grain |
| Unsuitable fabric choice | Cloth hangs unlike the planned garment fabric | Choose practice cloth with similar weight and drape |
| Inadequate pinning | Fabric slips or shifts on the form | Secure the fabric before shaping |
| Rushing adjustments | Uneven folds or a strained fit | Refine patiently and check each change |
| Trusting the form’s standard shape | Design stays close to its default outline | Test shapes beyond the form’s outline |
The form gives us a base, but it does not have to set the design’s limits. We can test shapes beyond its usual outline and support them with fabric placement. This may help us see a new volume that a fitted form alone would not suggest.
Loose pins can let the cloth shift while we assess it, which can make a good idea look uneven. Slow down long enough to see whether the adjustment solved the problem. Before accepting a drape, confirm that its flow is intentional rather than the result of fabric distortion.
How Can We Build Draping Skills Through Practice?
Build confidence by practicing on a fitted bodice or straight skirt before attempting a highly sculptural design. These smaller projects let us learn how the form and fabric work together. Steady practice gives us a better base for more complex choices.
Start with dress-form basics, then build toward garment experiments. A beginner lesson path can move from form setup and muslin work to bodice and skirt slopers. A sloper is a basic fitted pattern used as a starting point.
Practice on Bodice and Skirt Foundations
Use this four-stage progression to build core skills before advanced garment lessons:
- Learn dress-form basics.
- Practice muslin blocking, marking, and pressing.
- Drape a bodice sloper.
- Drape a straight-skirt sloper.
A bodice sloper gives us a controlled way to study fit around the upper body. A straight-skirt sloper offers another simple base for testing length and shape. Both foundations teach us to read how fabric responds before we add complex details.
Once these pieces feel familiar, we can explore more advanced garment ideas. The skills carry over, but each new design still asks us to observe how its fabric behaves. Practice turns small changes into useful lessons.
Study How Designers Use Draped Fabric
Study how fabric volume and placement affect a silhouette in designers’ work. Lanvin’s Fall 2025 collection, led by Peter Copping, drew on Jeanne Lanvin’s robe de style shape and included cape details and spiral-draped ribbon dresses. Vogue’s Lanvin collection review describes those design choices.
Test one change at a time on the form so we can see what caused the result.
Record each test with notes or a sketch, including where the fabric sat and what silhouette it made. A quick drawing can capture a shape that is hard to remember once the cloth moves. Keep a small record of each test so we can compare how a change in placement affects the result.
Conclusion
We can make better design decisions when we let the fabric show us how a silhouette works on the form. Grain and fabric behavior deserve close attention because both affect the way a garment falls. Draping lets us test shape before committing to a flat pattern.
For a first try, choose a simple sketch and prepare a woven muslin practice piece that suits its planned fabric. Keep the idea small enough to adjust without losing the design’s main shape. Choose one simple sketch, prepare a practice piece and begin with a relaxed, well-anchored first drape.