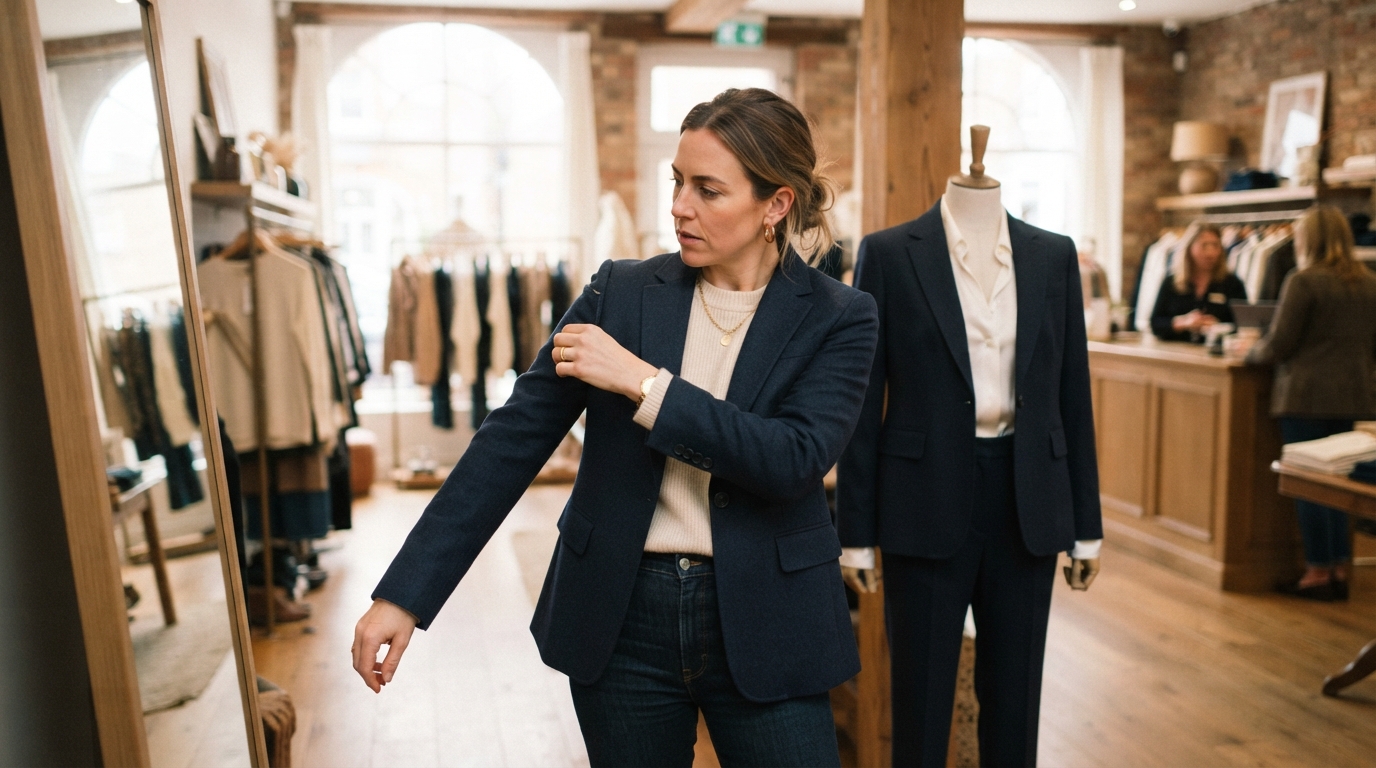
A garment can look promising on a hanger and still pinch at the shoulders, gap at the waist or restrict a simple reach. That small letdown can change how often someone wears the clothing and how confident they feel in it. Comfort matters because customers judge a garment while moving, not just while looking in a mirror.
Garment Fit Optimization gives us a practical way to make design choices that better serve the people who wear our products. It connects fit with comfort and customer confidence, while recognizing that no single pattern suits every body. A useful process starts with wearer needs and checks design decisions against them.
Key Takeaways
- Fit reflects both appearance and comfort during movement.
- Body measurements, garment shape and fabric all affect fit.
- Size labels do not promise the same fit across brands.
- Test garments in ways that match their intended use.
- Document fit choices so production can follow them.
- Review a fit issue before deciding on an alteration.
What Does Garment Fit Optimization Mean in Product Development?
Fit optimization aligns a garment’s shape and dimensions with its intended wearer, style and movement needs. Ease allowance is the planned difference between body and garment measurements that provides the intended room, movement and silhouette.
Fit describes how a garment relates to the body, including measurements, proportions and ease allowance. Good product development checks both aesthetic fit and comfort fit. A garment can look balanced but still feel tight when the wearer sits or reaches.
A successful fit balances appearance with enough room for the garment’s intended use.
During fit evaluation, we can classify a garment as tight, fit or loose. These terms describe its relationship to the wearer, not whether the wearer has a “right” body. Fit is personal and depends on the intended design.
A close-fitting dress may follow the body and still need room for walking and sitting. A relaxed hoodie calls for more space and a different outline. The same measurements can create different results in either style.
Garment proportions and structure shape the outline we see on the body. Our silhouette and proportion guide explains how those choices affect visual balance.
A successful fit balances appearance with enough room for the garment’s intended use.
How Should We Measure the Body and the Garment?
A reliable fit comparison begins with the tape level, the wearer standing naturally and every measurement recorded in the same unit. Repeatable measurements help us tell a real fit issue from a measuring difference.
Keep the tape level and in snug contact with the body, without compressing it. Record inches or centimeters consistently, and note the measurement date and wearer. Body measurements describe the wearer; garment POMs describe specific points on the clothing.
A garment measurement point, or point of measurement (POM), depends on the garment’s construction. For example, a waist POM may follow a seam or another defined place on the garment. The tech pack should name each POM clearly.
| Measurement | Where to measure | Practical check |
|---|---|---|
| Bust | Around the fullest part of the bust | Keep the tape level and snug without pressing into the body |
| Waist | Around the natural waistline | Stand naturally and check that the tape stays level |
| Hips | Around the fullest part of the hips | Keep feet together and confirm the tape does not tilt |
Take care to record the same landmarks each time. A small shift in tape position can make a comparison less useful, especially when several people collect measurements. Keep the unit beside each recorded value.
Repeat a measurement that differs from the first before using it to change a pattern.
How Do U.S. Clothing Sizes Relate to Body Shape?
A U.S. size label is a starting point, not a universal body measurement or a promise of the same fit across brands. Brand charts differ because manufacturers use different size assumptions and garment proportions.
A general U.S. women’s chart places size 12 at 38-40 inches bust, 32-33 inches waist and 41-42 inches hips. It recommends choosing the larger size when measurements fall between sizes. Current North American sizes have little connection to the older statistical sizing system.
| Category | Typical height or size format | Practical meaning |
|---|---|---|
| Misses | Designed around about 5 ft 4 in | Common women’s sizing category, but brand charts vary |
| Misses petite | Generally for women under 5 ft 4 in | Proportions are adjusted for shorter height |
| Tall | Usually for women 5 ft 8 in or above | Longer proportions may suit a taller wearer |
| Juniors | Often odd sizes from 1 to 15 | Commonly corresponds to the next number up in misses |
A 1940s study measured almost 15,000 women and identified five to seven body shapes. It did not establish one average dress size for women in the 1950s. In 1958, the National Bureau of Standards created a women’s system with sizes 8-38, plus height and lower-body-girth indicators.
The system became voluntary in 1970 and was withdrawn in 1983. ASTM International published a voluntary women’s sizing standard in 1995 and revised it in 2001 and 2011, but brands did not widely adopt it.
A reported North American average is 5 ft 4 in, 170-180 pounds and sizes 16-18. These figures describe a population estimate, not an individual sizing rule. Measurements cannot establish a dependable weight-to-size conversion or verify a historical figure’s dress size.
Marilyn Monroe’s 1945 modeling record lists her height as 5 ft 6 in, weight as 120 pounds and measurements as 36-24-34. Measurements recorded on May 19, 1962, give 35.5 inches bust, 23.5 inches waist and 33.25 inches hips.
Compare the chart with the wearer’s measurements and the garment’s intended proportions, not with a celebrity’s reported measurements.
How Do We Set Ease for Comfort and Movement?
A body measurement alone cannot tell us whether a garment will feel comfortable, because the pattern must account for its intended ease. Planned ease depends on style, material behavior and the activity the garment must support.
Positive ease means the garment measures larger than the body, creating room and helping fabric fall away from the body. The planned amount can change the silhouette. A relaxed shirt needs room to move without losing its shape.
Positive Ease for Room and Drape
Relaxed shapes often use positive ease to allow space for movement and a softer drape. A hoodie may need room through the chest and sleeves for a base layer. Too much room can make it look bulky or cause seams to shift.
Negative Ease for Stretch and Hold
Negative ease makes a stretch garment smaller than the body measurement. It can help a garment stay close to the body, but only when the fabric stretches and recovers well. Stretch alone is not enough; recovery affects whether the garment keeps its shape.
Two fabrics with the same stretch can feel different against the body. A fabric that stretches easily but stays stretched may feel loose after wear. A firm fabric may feel restrictive even when its measurements seem suitable.
Check Ease Against the Garment’s Use
A fitted dress and a relaxed hoodie need different ease choices. Sitting, reaching and breathing can expose a lack of room that a standing pose hides. These actions also show whether the intended silhouette still works during movement.
The phrase fit important reflects a practical truth: ease changes how a garment looks and feels. Designers should consider the wearer’s tasks as well as the garment’s shape. A fitted dress for an evening event may need less room than a dress worn all day.
Our guide to silhouette, volume and fabric also shows how ease can change a garment’s outline. Judge ease in the fabric and activity the finished garment is actually meant for.
How Can We Diagnose a Garment Fit Problem?
Start by locating the first point where the garment restricts movement, collapses or pulls away from the body. That location helps us separate tightness, looseness and balance issues from a style mismatch.
A fit problem can come from garment style, pattern, body shape, body dimensions or fabric. Tight, fit and loose describe distinct conditions, but one wrinkle does not tell us which condition exists. Do not assume every wrinkle means the garment needs to be taken in.
- Pulls or gaps: Note exactly where the garment strains or falls away.
- Seam balance: Check whether seams hang straight or twist around the body.
- Movement: See whether the wearer can move as the garment is meant to allow.
- Fabric behavior: Look for stretching, collapse or bunching that affects the shape.
For example, a diagonal fold near the chest might reflect upper-chest tension or a shoulder issue. A seam that swings forward could point to balance rather than excess width. We need the full garment view before choosing a cause.
Separate an intended design feature from an unintended fit symptom. A roomy sleeve may be part of the style, while a sleeve that blocks a reach may be a problem. Details and testing matter more than a single mirror view.
Record the symptom and its location before deciding which pattern piece to change.
Which Pattern Adjustments Correct Common Fit Issues?
We correct a pattern at the location that creates the fit symptom, while checking whether the change disturbs balance elsewhere. Local changes should preserve the intended design and garment balance.
A pattern, body dimensions and garment style all influence fit. Designers should use the recorded symptom to guide the adjustment, rather than treating one alteration as a universal fix. After a local change, check the full garment shape again.
Shoulder and Upper-Chest Balance
Shoulder width can affect how the sleeve hangs and where the garment sits. Pulling across the upper chest may signal a need to inspect shoulder or chest shaping. The symptom alone does not prove which pattern area needs change.
Waist and Hip Shape
Side seams can be taken in or let out to alter contour. A waist that feels loose may need a different contour, while hip tightness may require more room through that area. Preserve the garment’s intended line as the seam changes.
Darts, Seams and Length
Dart width, length and angle shape the garment around the body. Dart placement can change how fabric follows the bust or waist. Garment length also affects where the shape falls and whether the hem sits as designed.
| Observed issue | Pattern area to inspect | Adjustment direction |
|---|---|---|
| Pulling across upper chest | Shoulder and upper-chest area | Review width and shaping before changing the side seam |
| Excess room at waist | Darts and side seams | Refine contour while keeping the hip line balanced |
| Hip seam pulls while standing | Hip width and side seam | Add room where the garment strains, then check the silhouette |
Changes to darts and seams affect nearby areas, so the result should be judged on the full garment. A small adjustment can shift a seam or change how the hem hangs.
Recheck the full silhouette after any local pattern adjustment.
How Does Fabric Change the Fit?
A pattern does not behave independently of its fabric, so a material substitution can change both silhouette and comfort. Fabric behavior affects how a garment hangs, stretches and presses against the body.
Equal garment measurements can produce different fitting effects in different fabrics. A soft knit may give during movement, while a firm woven fabric may hold its shape. A material change can shift pressure points even when pattern measurements stay unchanged.
- Stretch and recovery: Check how far the fabric stretches and whether it returns.
- Drape: Notice whether the material falls softly or stands away from the body.
- Thickness or structure: Account for layers and stiffness that change the outline.
- Seam behavior: Check whether the material puckers, slips or adds bulk at seams.
These material details help us understand why the same pattern can behave differently across fabrics. A soft fabric may cling, while a structured one may hold space around the body. The change can alter both comfort and appearance.
A digital image can help compare shape, but it cannot prove how a fabric feels against the skin. Virtual fit depends on how well the material is represented, including its stretch and drape.
Confirm a material change against the fit goals before carrying the pattern into production.
How Should We Develop and Review Fit Samples?
A useful fit sample tests the pattern in material that behaves like the garment we intend to sell. A representative prototype lets us review both pattern choices and material effects before production.
Agree on an initial block, meaning the base pattern used to develop a style. The team should also define customer fit goals, such as a close or relaxed look. A sample needs a clear purpose, not just a place in the development schedule.
Set the Base Pattern
Choose a starting pattern that fits the target customer and the intended garment style. Record which body and fit goals guide that base. This helps the team judge later changes against a known starting point.
Make a Representative Prototype
Use fabric that matches the final material as closely as possible. Muslin can hang and feel very differently from silk chiffon, so it may not show the finished garment’s drape or pressure points. A prototype should test more than its outline.
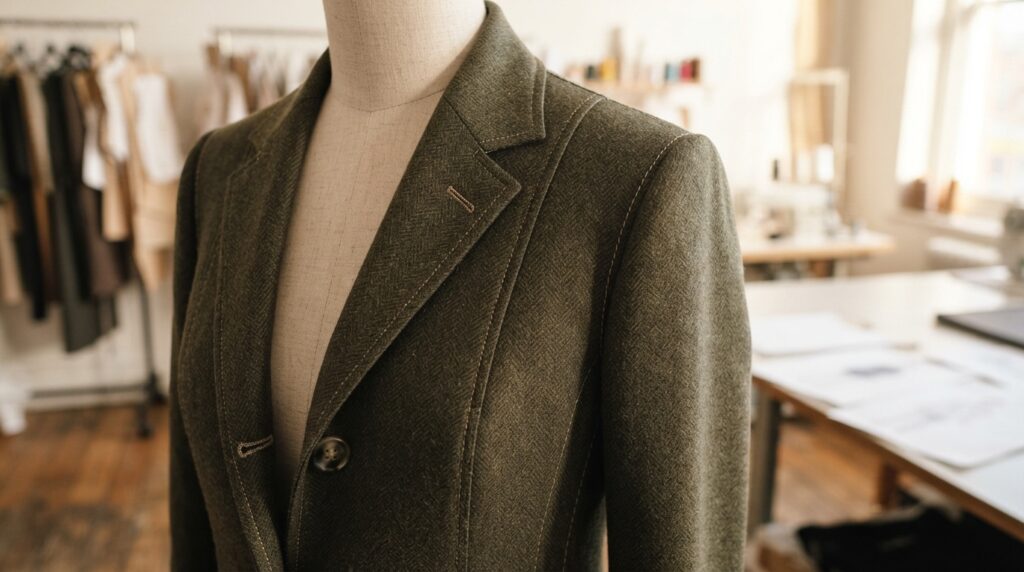
Review and Record Each Revision
For every sample, record garment measurements, fit observations and the reason for each change. Note whether a revision fixed the original symptom or created another issue. Keep the record with the sample details.
Clear records let designers, pattern makers and sample makers compare revisions without relying on memory. They also help keep the discussion focused on what the next sample must show.
Keep a written record of what changed and what the next sample must prove.
How Do We Test Fit on a Wearer?
A garment that looks balanced while standing still may reveal a restriction as soon as the wearer sits or reaches. Wearer testing checks appearance, comfort and movement instead of relying on one static pose.
Use a fit model who represents the intended customer, not only a convenient sample wearer. A fit model helps us assess both aesthetic fit and comfort fit. Feedback should include how the garment feels as well as how it looks.
- Stand naturally: Observe the garment’s balance and overall appearance.
- Sit: Note pressure at the waist, hips, chest or thighs.
- Walk: Watch for shifting seams, pulling or fabric that restricts steps.
- Reach overhead: Check shoulder and sleeve movement.
- Bend: Look for tightness, gaping or changes in coverage.
Fit models can assess comfort, fit and tactile feel while trying different postures. A 2024 study of fit sessions discusses how this feedback shapes design decisions and points to limits in virtual fitting.
Record pressure, restriction, shifting seams and appearance beside the action that revealed them. A wearer may feel pressure before a clear visual wrinkle appears, so both types of observation matter.
Record the wearer’s feedback beside the relevant garment measurement and fit observation.
When Do Digital Fit Tools Help?
Digital fit tools help us compare pattern and material decisions before committing to another physical sample. Digital product development can show how patterns fit digital bodies, but its value depends on accurate inputs.
Virtual try-on uses garment patterns to model a 3D garment without making a physical garment. Teams can compare fit options and spot likely issues early. A virtual result does not directly reproduce a wearer’s physical sensation.
Visualize Patterns on Digital Bodies
Digital bodies, or avatars, represent the wearer in the software. Their shape and proportions affect the result, so an avatar needs to reflect the intended customer. A mismatch can make a design appear suitable when it is not.
Simulate Material Behavior
Material properties must be represented accurately for a simulation to be useful. Stretch, drape and structure affect the 3D garment. If those inputs are off, the image may not match the fabric’s real behavior.
Use Fit Prediction as a Screening Step
One fit-prediction study used digital clothing pressure to classify garments as tight, fit or loose. It tested BP-ANNs, Random Forest and Bayesian Classifier methods. Those models offer a screening step, not a substitute for the wearer’s direct feedback.
A 2023 research study used 3D body scans and questionnaire data from 120 adults to predict ease preferences for four garment types. It used an artificial neural network to predict pattern parameters and a generative adversarial network to visualize fitted prototypes. Read the study on virtual fit prediction for its methods.
Fit accuracy still depends on the avatar, material data and fit goals. A digital result can help a team choose what to test next, but movement and physical sensation remain hard to model.
Treat a virtual fit result as a decision aid that still needs validation against the intended wearer and use.
What Belongs in a Fit Tech Pack?
A factory cannot reliably reproduce an intended fit from a sketch and a size label alone. A clear tech pack gives pattern makers, sample makers and factories shared technical information.
Include enough detail for each team to build the same garment and measure it the same way. Clear instructions reduce disagreement about what a sample should measure or how it should be made.
- Materials and product description: Name the fabric and describe the garment.
- POM measurement specifications and sewing instructions: Define points and construction.
- Grading and cutting guidance: State how sizes and fabric pieces should be handled.
- Technical drawings: Show seams, placements and other construction details.
- Swatches, colors, labeling, testing and packing requirements: Specify each needed item.
Technical drawings can show details that are hard to explain in a paragraph, such as pocket placement or seam shape. Pair them with clear measurement specifications and sewing instructions.
Keep the information consistent across pages, so sample makers do not have to guess which measurement or color reference is current. Check that every measurement and construction instruction can be understood without relying on an informal conversation.
How Do We Keep Fit Consistent Across Sizes and Production?
Consistency across a size range comes from testing the brand’s own grading rules, not from assuming every factory uses the same standard. Brand-specific grading gives production teams a shared basis for fit across sizes.
Current North American sizes have little connection to the older statistical U.S. system, and brands use different size assumptions. Fit across a range needs deliberate testing, not simple proportional scaling.
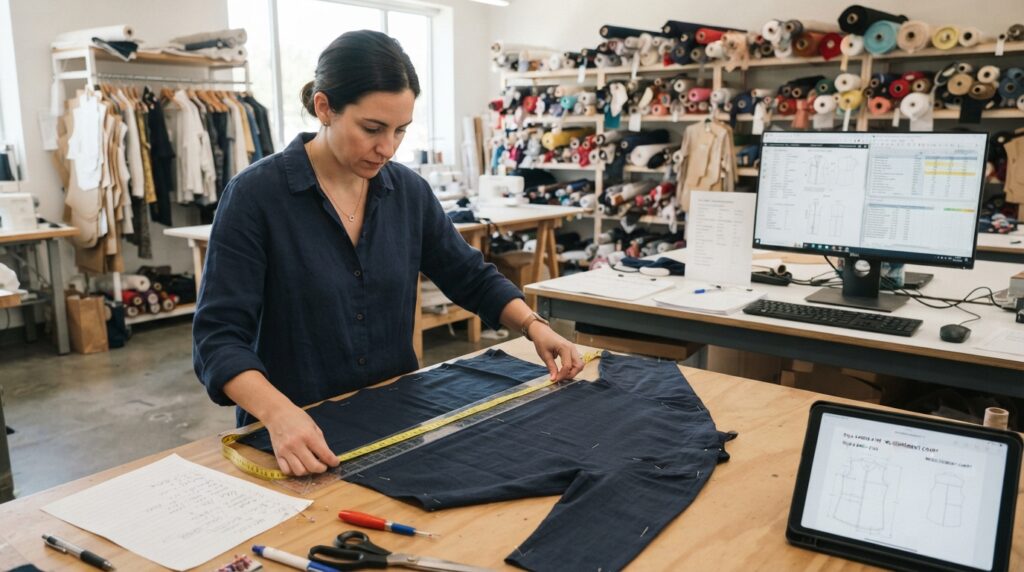
- Define the target customer and base size for the product.
- Grade from brand-specific measurements, not an assumed universal standard.
- Check the sample and graded measurements together.
- Compare the production sample with the approved pattern and specifications.
A reported North American average of 5 ft 4 in, 170-180 pounds and sizes 16-18 provides population context, not a rule for an individual. Use the intended customer and the brand’s measurements to guide decisions.
Quality control should compare the approved design details with the garments made for sale. A mismatch in measurements or construction can shift the fit even when the base sample looked right.
Keep the approved pattern, graded measurements and production sample aligned during quality control.
How Do We Calculate Efficiency in Garment Production?
Line efficiency expresses the standard garment minutes produced as a share of the available operator minutes. SAM means Standard Allowed Minutes, also called Standard Minute Value, for a garment operation or product.
The formula is: (pieces produced × garment SAM) ÷ (operators × worked minutes) × 100. SAM includes allowances for fatigue and personal needs. Time-study allowances typically add 10-15% for personal needs, fatigue and delay.
For 48 operators working 480 minutes, with 350 garments produced and a SAM of 44.25 minutes, multiply 350 by 44.25. Divide that result by 48 times 480, then multiply by 100. The line efficiency is 67.2%.
The line-efficiency formula and example show how standard minutes compare with worked minutes. SAM changes with garment complexity, so the product type matters when we compare production results.
| Garment type | Typical SAM | Production implication |
|---|---|---|
| Basic T-shirt | 8-12 minutes | Fewer standard minutes per piece than structured garments |
| Formal shirt | 18-28 minutes | More sewing steps raise the standard time |
| Structured jacket | 45-60 minutes | Complex construction needs far more standard time |
Line efficiency is a production measure, not a direct measure of fit quality. A line can meet its time target while garments still need fit review. Compare efficiency only when SAM, worked time and production conditions are defined consistently.
What Can We Do When a Finished Garment Still Fits Poorly?
A small hem or seam adjustment may solve a localized issue, while a balance problem can call for a different size or pattern. The right choice depends on whether the problem is local or affects the garment’s overall shape.
Alteration costs depend on construction, fabric, layers and the work required. One alteration price list starts pants or trouser hems at $18, original jeans hems at $35, casual or cocktail dress hems at $50, and suit-jacket side alterations at $55.
The same list prices wedding-dress side alterations at $95-$250, a one-layer wedding-dress hem from $125, zipper replacement at $45-$65 and button replacement at $5. These are examples from one price list, not universal U.S. rates.
An alteration cannot always correct a pattern or proportion problem. If shoulders, armholes or overall balance feel wrong, a different size or cut may work better than extensive changes.
Returning or exchanging the garment may be more practical when a major change would cost too much or alter its shape. The listed alteration starting prices offer a useful cost example, but they do not set a national rate.
Before authorizing work, confirm the alteration will preserve the garment’s intended shape and construction.
How Does Better Fit Support Lower-Impact Clothing Choices?
Better fit can address one reason people return clothing, but it does not remove every cause of returns or overconsumption. Fewer avoidable returns can help reduce waste when people keep and wear what they buy.
A 2022 Hot or Cool Institute report set five new clothing items per year as the level needed to stay within the 1.5°C carbon budget, if nothing else changes. This five-item rule is a climate-budget condition, not a personal quota.
Use the five-item figure as a climate-budget rule, not as a personal quota.
The rule excludes underwear, hats, scarves and socks. It counts bags, shoes, gifts and second-hand items. The five-new-items carbon-budget figure sets a specific scope for that clothing rule.
A 2019 global study found that 46% of consumers named wrong size, fit or color as their main reason for returns. It also found that 56% bought multiple sizes to try at home. These figures describe consumer behavior, not a guarantee that better fit prevents returns.
Brands can use fit feedback to reduce some avoidable returns, while recognizing that color, preference and other issues still matter. Use fewer, better-tested purchases as a practical choice, while treating the five-item figure as a climate-budget rule rather than a personal quota.
Conclusion
Better-fitting clothing starts with a clear account of who will wear it and what the garment must let that person do. A consistent fit comes from a clear target wearer, documented measurements and checks in materials that represent the finished product.
We can make the next sample more useful by choosing one fit issue to test and recording the measurements tied to it. That gives the team a clear way to judge whether the revision worked.
Before approving the next sample, write down the measurements and the fit issue the sample must resolve.