
A garment becomes production-ready when its creative idea is clear enough for a factory to make consistently. For US apparel brands, that means turning ideas into technical and commercial decisions that customers can understand and factories can follow.
A tech pack is a production document that gathers a garment’s drawings, materials, measurements, construction details, and finishing specifications for the factory. We use it to connect a brand’s direction with clear instructions, while recognizing that materials, complexity, and approvals affect timing.
The Apparel Design Development Process helps teams carry a product from early research toward factory production. We can reduce avoidable revisions by agreeing on the garment’s purpose, target customer, and intended market before development begins.
Key Takeaways
- Start with customer needs, use, market, and brand direction.
- Turn selected design ideas into precise technical details.
- Use samples to check fit, materials, and construction.
- Approve the current specifications before production starts.
- Plan time around sourcing, reviews, revisions, and shipping.
What Does the Apparel Design Development Process Include?
Product development connects creative fashion design with the specifications and approvals needed to make a garment. Design alone does not cover the full process, which also includes technical work, sourcing, sampling, production, and quality checks.
Product development carries a customer need through design, factory planning, and checks on finished garments. The University of Wyoming describes apparel development as a mix of creative design, technical execution, and industry knowledge in its apparel design and product development program.
Product development connects creative choices with the specifications and checks needed to make a garment consistently.
Fashion design shapes how a product looks and feels. The Fashion Design Institute names five core elements: line, shape and silhouette, texture, color, and pattern.
It also names six design principles: balance, proportion, emphasis, unity, movement, and contrast. These terms help us describe a design, but they do not form a required seven-element checklist.
Product development includes the work that makes a design possible to produce at a cost and quality that suit its market. That work can cover patternmaking, fabric selection, fit testing, sourcing, production planning, and quality.
Workflow diagrams may divide the same work into different stages. One team may group research and concept work, while another tracks them as separate steps.
Ready-to-wear means finished clothing sold in standardized sizes. It differs from bespoke and made-to-measure clothing, which tailors to an individual.
Ready-to-wear is also the opposite of haute couture, which involves individually made fashion. For a closer look at made-to-measure suits, we can compare how individual measurements shape a custom order.
For a standardized-size retail product, the design must work for a customer group rather than one person’s measurements.
How Do We Turn Research Into a Design Brief?
We can describe the same workflow in five broad phases or in more detailed steps, depending on how closely a team tracks each decision. Customer evidence helps us turn trend and market research into a useful direction for product development.
Begin with a clear customer, use case, and market position before choosing a design. Apparel design development process steps may appear as five, seven, eight, nine, or 11 stages, yet the core work stays much the same.
Research the customer, market, and inspiration
We gather four kinds of information before shaping fashion ideas:
- Customer needs, such as comfort, climate, and preferred fit.
- Market and price position, including nearby competitor products.
- Visual references, such as color, texture, shape, and trend cues.
- Product-use requirements, such as work, travel, or daily wear.
These inputs help us set a product’s role and the details customers may value. A customer’s wardrobe needs can differ for daily wear, work, and special events.
Mood boards combine color, texture, shape, and cultural or non-fashion references. A building, landscape, or piece of art can inspire a direction without dictating the finished garment.
We should study competitor products to understand the market, not copy their design. Copying one reference image can leave a brand with an unoriginal product and no clear reason for customers to choose it.
Build concepts, sketches, and a line plan
We turn the brief into several concepts, then sketch loose silhouettes to compare shape and proportion. The strongest options can become selected sketches with planned colorways.
A line plan shows how styles work together as a collection. It can record style names, colors, sizes, and planned product roles without locking details that still need testing.
Our design process should keep the target customer visible as sketches change. A brief that states the target customer and use case helps prevent attractive ideas from drifting away from the product’s purpose.
What Belongs in a Tech Pack?
A factory needs more than a polished illustration to reproduce a garment accurately. A tech pack connects the design with specific instructions for construction, measurements, materials, color, labels, and packaging.
Keep one current tech pack that gives the factory clear, usable specifications. An expressive fashion illustration shows mood and styling, while a technical flat shows the garment’s shape and details in a precise, flat drawing.
Specify the garment’s appearance and construction
Technical flats show front and back views, seams, closures, pockets, and other design features. Callouts can point to details that a flat view alone may not explain.
Construction instructions describe how parts join and how details should look. We should name stitch types or seam finishes when they affect the garment’s appearance or strength.
Record materials, measurements, and finishing details
The Bill of Materials (BOM) records fabric, trims, labels, and other parts used to make the product. A Point of Measure (POM) identifies where a garment measurement is taken.
A tech pack may also include measurement specifications, grading rules, label placement, packaging, and quality standards. Specifications and costing details can change as sourcing and sample decisions become firm.
| Tech-pack item | Information recorded | Factory use | Update trigger |
|---|---|---|---|
| Technical flats and callouts | Front, back, seams, closures, details | Shows shape and design features | Design or construction change |
| BOM | Fabric, trims, labels, packaging parts | Lists required materials | Material or supplier change |
| Measurements and POMs | Measurement points and size values | Guides fit and size checks | Fit or measurement revision |
| Construction plus finishing | Seams, finishes, labels, quality details | Guides assembly and final details | Sample or quality change |
Missing or unclear measurements can trigger avoidable factory questions. A POM diagram should make each location easy to find, especially for curved or angled areas.
Before sending a revision, confirm that the factory has one clearly identified current version of the tech pack.
How Do Fabric, Patterns, and Prototypes Shape the Garment?
A fabric choice can change the shape and behavior of a garment even when its sketch stays exactly the same. Material choices affect drape, fit, construction, and the product’s ability to meet its intended use.
Recheck drape and construction whenever fabric weight or structure changes. We compare fabric and trims by weight, stretch, recovery, hand feel, durability, color behavior, cost, and production feasibility.
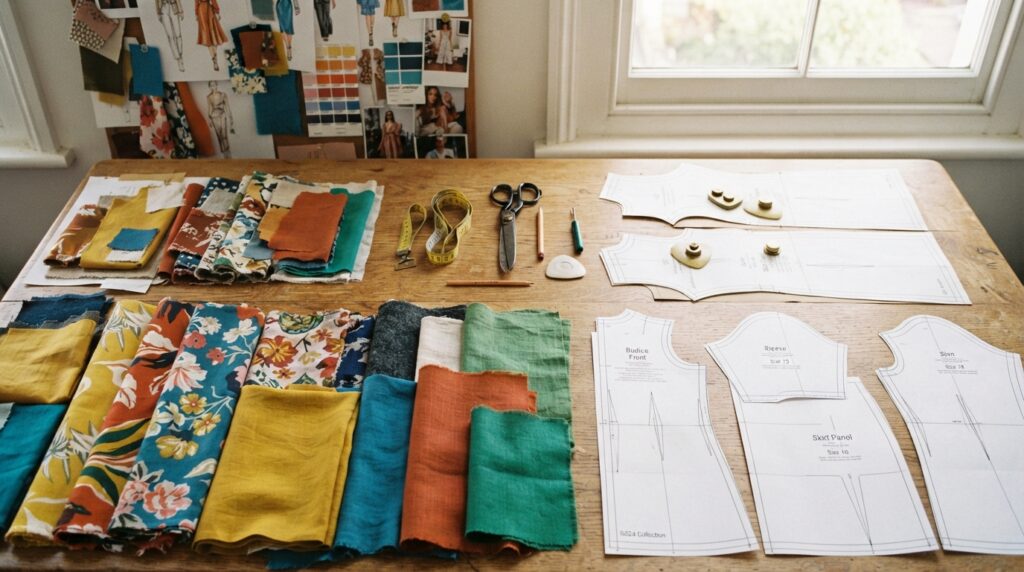
Match fabrics and trims to the intended use
Sourcing covers the fabric, trims, labels, and packaging needed for the garment. A soft fabric may suit a relaxed top, while a firmer one may better support a structured shape.
Fabric weight matters beyond how heavy a material feels. Changing from 180 GSM jersey to 280 GSM or 300 GSM can change drape, neckline behavior, sleeve fall, perceived volume, and silhouette.
A fabric that looks right on a swatch may behave differently after cutting and sewing. We should check stretch and recovery, since poor recovery can leave a garment stretched out after wear.
Translate the design into pattern pieces
A pattern converts a flat design into pieces a factory can cut and assemble. A simple T-shirt pattern may use front and back body pieces, sleeves, and a neck rib.
A hoodie pattern may add hood panels, a kangaroo pocket, waist rib, cuffs, and reinforcement pieces. Those pieces shape the garment and support its construction.
Patterns also turn the design’s dimensions into cut shapes. A change to the sleeve or neckline can affect how nearby pieces join.
Use the prototype to test real-world behavior
The prototype sample is the first physical garment version. It lets us check the shape and construction on a body, rather than relying only on sketches or a pattern.
For example, a heavier jersey may hold a wider sleeve in place but make a lightweight tee feel bulky. A hoodie pattern’s pieces show how material and construction choices work together.
Digital garment-prototyping software such as CLO3D can help us visualize a design. It cannot replace checking physical fabric and fit on a real garment.
Recheck the intended drape and construction whenever a material substitution changes the fabric’s weight or structure.
How Does Sampling and Fit Approval Work?
The first sample is a test of the design in three dimensions, not a guarantee that the garment is ready for bulk production. Sampling gives us a chance to review fit, construction, materials, and color before approval.
Approve only a sample whose fit, construction, materials, and current tech pack agree. The review cycle runs from sample to fit and construction review, then to a tech pack update and revised sample.
Review prototypes and revise the specification
Early samples may use substitute materials if production materials are not ready. Final approval should match confirmed materials and specifications, so the factory can make the bulk garment to the same standard.
During a 2026 apparel timeline, sampling spans weeks 5-10 and may include Proto 1, Proto 2, and sales samples. Proto 1 may use substitute fabric, while Proto 2 uses production fabric.
Sales samples are final versions for photography, marketing, and pre-order campaigns. A development sample refines fit, construction, and design, while the PPS represents the approved style before bulk manufacturing.
We can check the garment against five areas during review:
- Measurements against the specification.
- Fit and mobility during wear.
- Silhouette against the chosen design.
- Construction, seams, and finished details.
- Material or color performance.
Textile testing may include colorfastness, tear and breaking strength, lightfastness, wet and dry rub fastness, pilling, abrasion resistance, and bursting strength. Three to six samples per style is one development estimate, though needed changes affect the count.
Confirm the final sample before bulk production
A fit change during pre-production sampling can add one to two weeks, while a construction change can add two to three weeks. A second lab-dip round can add one to two weeks if the first color round misses requirements.
Do not approve a sample while specification changes remain unresolved. The PPS should match the confirmed production materials and current tech pack before the factory begins bulk work.
Approve only a sample whose fit, construction, materials, and current tech pack agree.
When Should We Grade Sizes and Lock Production Specs?
Grade the pattern only after the base-size fit is approved. Grading develops additional sizes from an approved base pattern, so the base fit must work before the factory expands the range.
Changing the base fit after grading can force repeated pattern corrections across the size range. Medium is a common adult base size, but the right choice depends on the customer profile and planned sizes.
Approve the base fit before grading
For an XS through XL range, Medium may be a practical starting point. It is not a universal choice for every collection or customer.
Our team should consider who will wear the garment and which sizes matter most. A customer group with a different size profile may need another base size to support useful fit reviews.
The usual sequence is base pattern, prototype, fit review, pattern correction, revised sample, base-size approval, and grading. Each fit correction should be made before grading begins.
Check the size range against the customer
Size labels alone do not show whether a range serves the intended market. We should compare the planned range with customer needs and the product’s position.
Once the base fit is approved, the factory can grade it into additional sizes. Clear production specifications help keep the design consistent across the range.
Confirm the intended size range and customer profile before the base pattern is finalized.
How Long Does Apparel Design Development Take?
A useful planning range is 3-6 months for development, while a complete from-scratch path through bulk delivery can take five to eight months. Planning ranges change with materials, complexity, revisions, and approvals.
Do not treat a development estimate as a guaranteed delivery date. Sourcing can overlap with design development, but a six-week fabric lead time can disrupt the schedule if material selection comes late.
| Phase | Example timing | Typical work | Schedule risk |
|---|---|---|---|
| Weeks 1-4 | 4 weeks | Ideation, tech packs, sourcing | Late material decisions or six-week fabric lead |
| Weeks 5-10 | 6 weeks | Sampling and sample review | Revisions or delayed approvals |
| Weeks 11-18 | 8 weeks | Bulk production and quality control | Complex construction or extended size runs |
A 2026 schedule groups ideation, tech packs, and sourcing in weeks 1-4, sampling in weeks 5-10, and bulk production and quality control in weeks 11-18. Primary fabric and trim choices should be set by week four.
Other planning estimates put product development at 8-12 weeks, fabric sourcing at 4-6 weeks with partial overlap, and bulk production at 6-8 weeks. Pre-production samples may take 4-6 weeks per round, plus revisions.
A full path from a new idea through bulk delivery may take five to eight months. Complex construction or an extended size run can add time.
Shipping adds another variable. Sample shipments from Portuguese facilities typically take three to five business days by air courier to international offices.
For international freight, air shipping is estimated at 5 to 10 business days, while sea freight takes four to eight weeks, depending on origin. We should include the chosen mode in the supply chain plan.
Project review may take 1-3 business days, pattern development 3-10 business days, a first sample 7-14 days, and revisions 5-7 days. Construction, materials, sample changes, and approvals affect those estimates.
Confirm fabric lead times and the freight plan before promising a delivery date.
What Happens During Production and Quality Control?
Bulk production turns the approved specifications into a run of garments, so quality checks must compare finished work with the approved sample and tech pack. Clear acceptance rules help the factory and brand judge the same details.
A passed sample does not ensure that every bulk unit will be identical. Production planning covers cutting, sewing, finishing, packing, shipment coordination, and inspections.
A passed sample sets the target, but bulk checks still need to catch differences between finished garments.
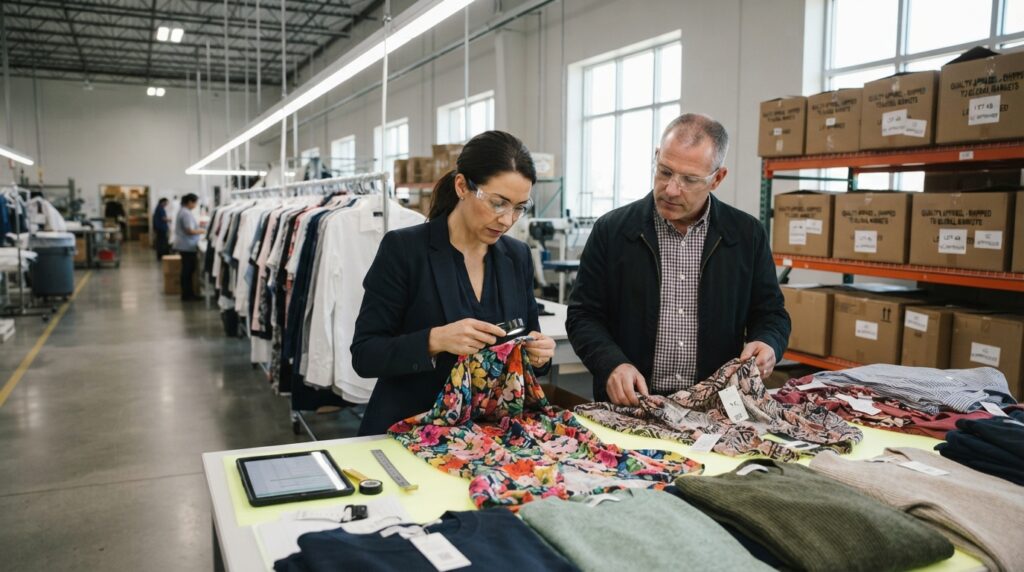
In-line checks take place during production, while final checks review finished garments. Both compare work with the approved tech pack and sample.
Inspection can focus on four categories:
- Color and fabric, including shade differences and fabric defects.
- Construction, including seams and other workmanship defects.
- Measurements, including differences from approved specifications.
- Labels or packaging, including placement and packing details.
ISO 2859-1 is an established statistical sampling framework for inspection by attributes. It supports inspection planning, but it cannot replace clear acceptance criteria for the garment.
After launch, customer feedback and sales performance can inform later color, proportion, material, or sizing updates. Those changes should be recorded as new product decisions.
Record inspection results against the agreed specifications before authorizing shipment.
Conclusion
A production-ready garment depends on clear decisions as much as a strong design idea. Current specifications and timely approvals help us limit avoidable rework and keep factory teams aligned.
Before contacting a factory, prepare a one-style brief with the target customer, use case, target cost, material direction, and desired delivery date. Those details give the team a concrete starting point.
Start with one complete style brief and ask the factory to confirm the development calendar before sampling begins.